Burp suite: Proxy
Introduction
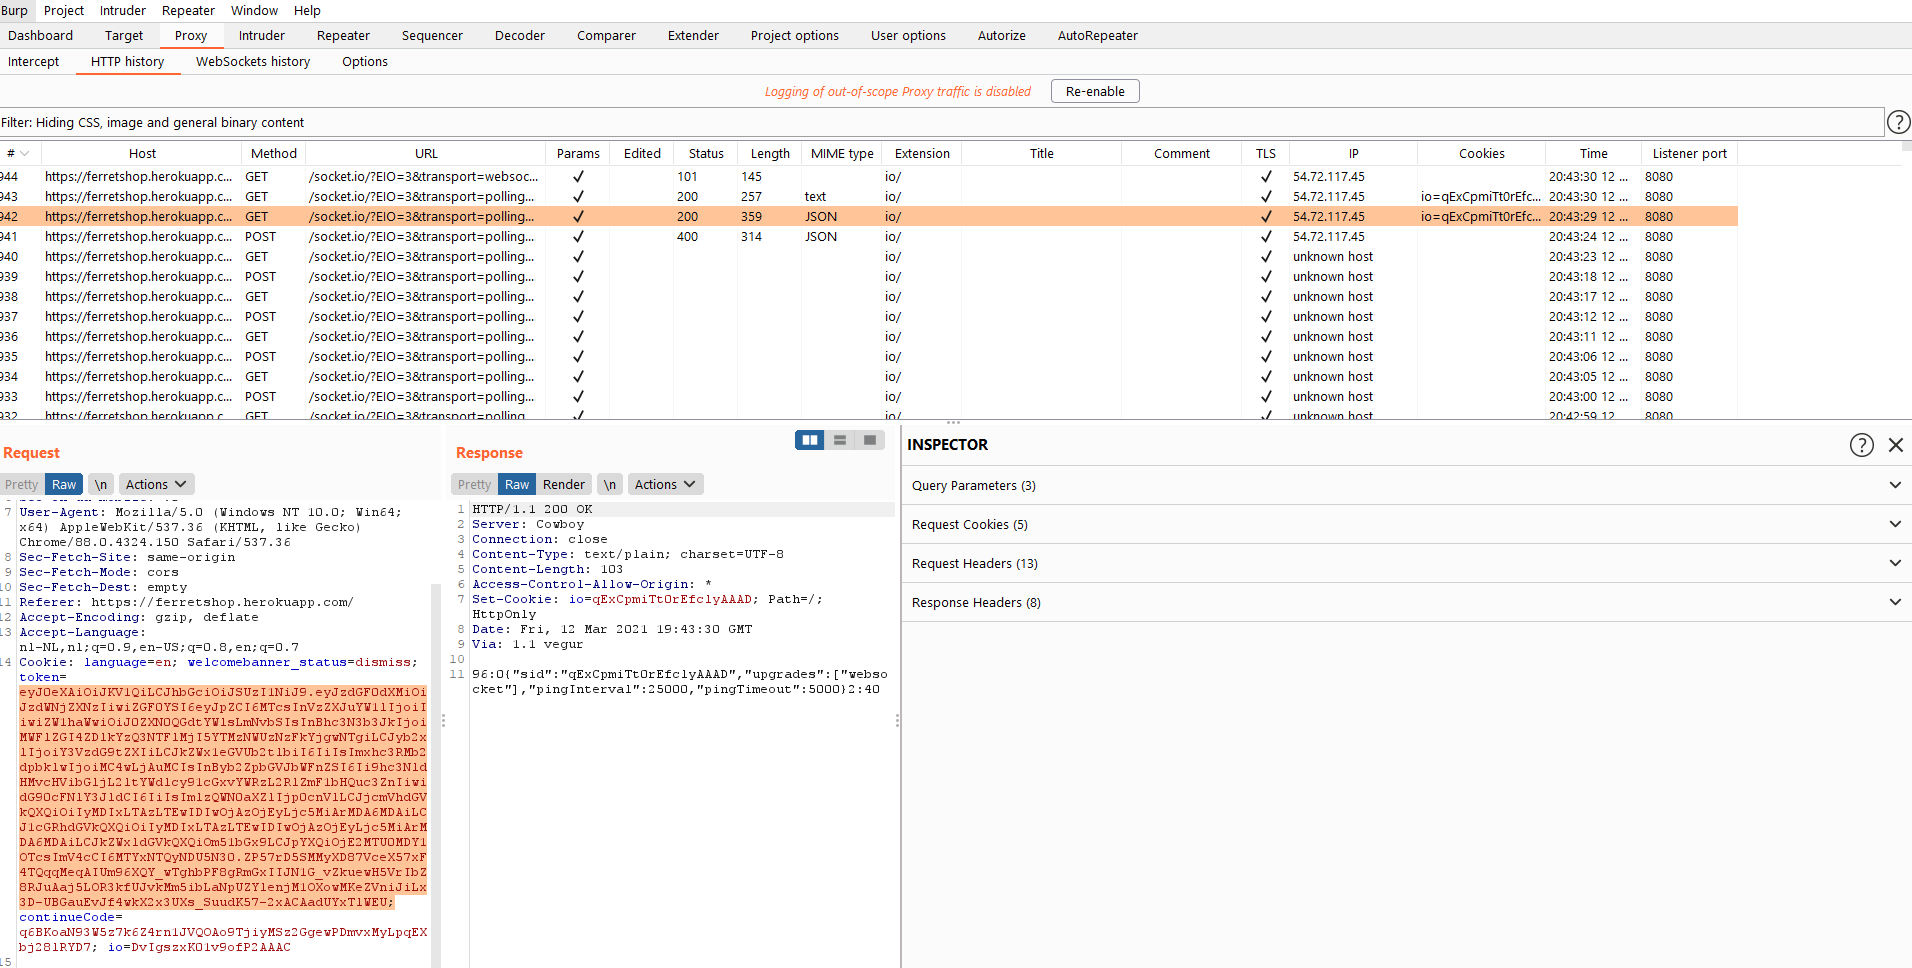
The proxy tab is going to allow us to interact with requests and responses in real time and investigate the proxy history. This is the tab i will use most as it contains all of my latests requests and can also handle websockets in the pro version of burp.
Intercept
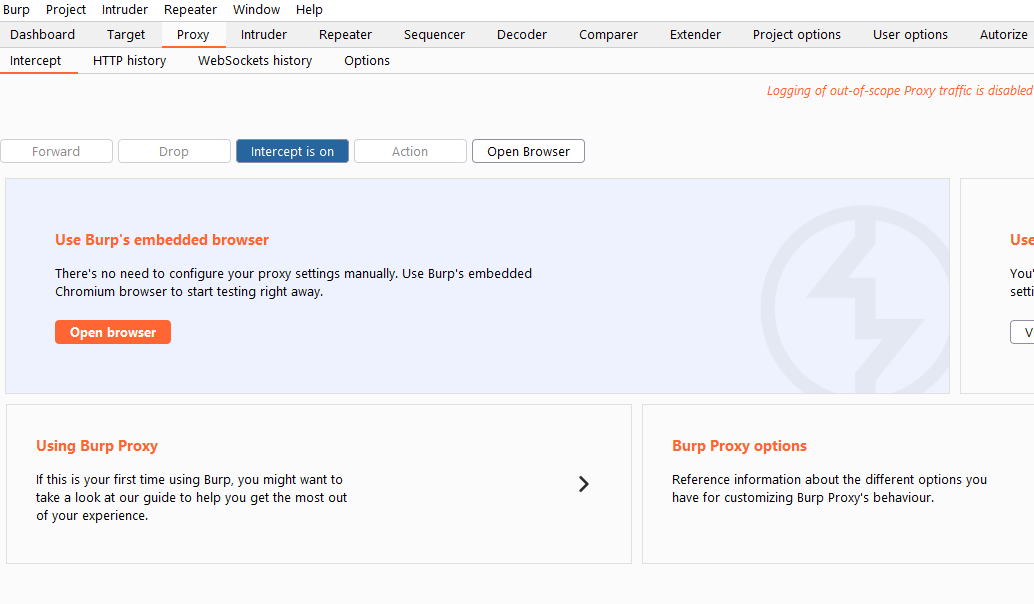
This is the basic landing tab of the proxy page. In here we have several options
- Put intercept on/off, if we enable intercept it will stop any request (even the ones not in scope) and allow you to edit, forward or drop requests
- Action, which allows us to perform a selection of actions on the current request that is being held by the interceptor
- Open browser, which allows us to open a builtin chromium browser that will automatically have the proxy set propperly. One thing i don't like about this browser is that it won't remember any plugins you install or any passwords you save.
HTTP history
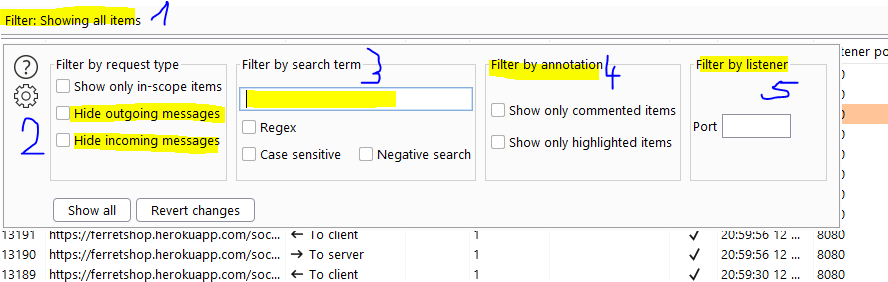
Filter
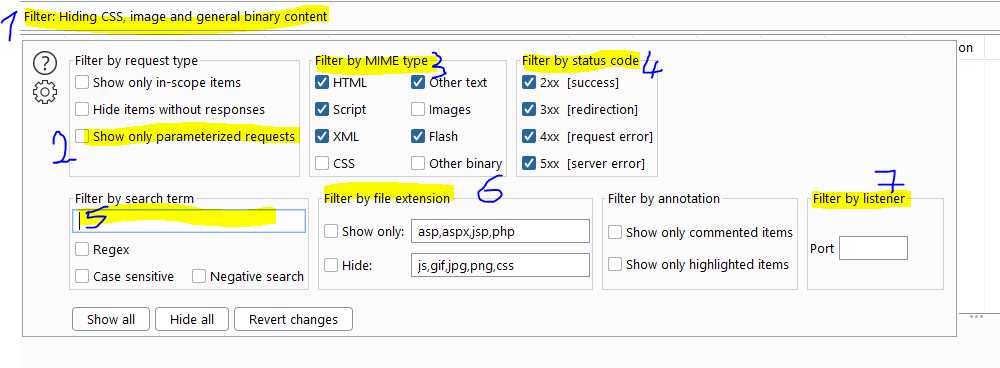
If we click the filter bar at the top of the screen, we can some very useful filters.
- Clicking the filter bar will open it for us
- Showing only the paramterised requests will show us all the requests that allow us some kind of interaction with the server. These are the requests that i care about mosts as they talk to the API.
- Filtering by mime type allows us to include or exclude certain types of files such as scripts or CSS files by checking or unchecking the checkbox respectively.
- If we want to show or hide certain status codes, that's also possible like the 4xx status codes which are disabled by default
- If we want to search for specific terms, that also possible. We can do this in negative search as well, which would mean that we would exclude requests with the search term in it.
- If we want to hide or show certain file types, that's also possible but we can't use both together as they would cancel eachother out
- We can have multiple proxy listeners which listen for incoming traffic on different ports. We can also filter per port. More on this later on in the proxy options.
We can also annote or comment certain requests by right clicking them in the site map, repeater or proxy history and then we can filter on those requests.
Websocket history
Since recently, it's also possible for Burp suite to process websocket messages such that we can edit and resend them. This is a very useful feature as before we would have to write our own python proxies to translate these WS messages into HTTP messages and back again that would act inbetween our target and burp.
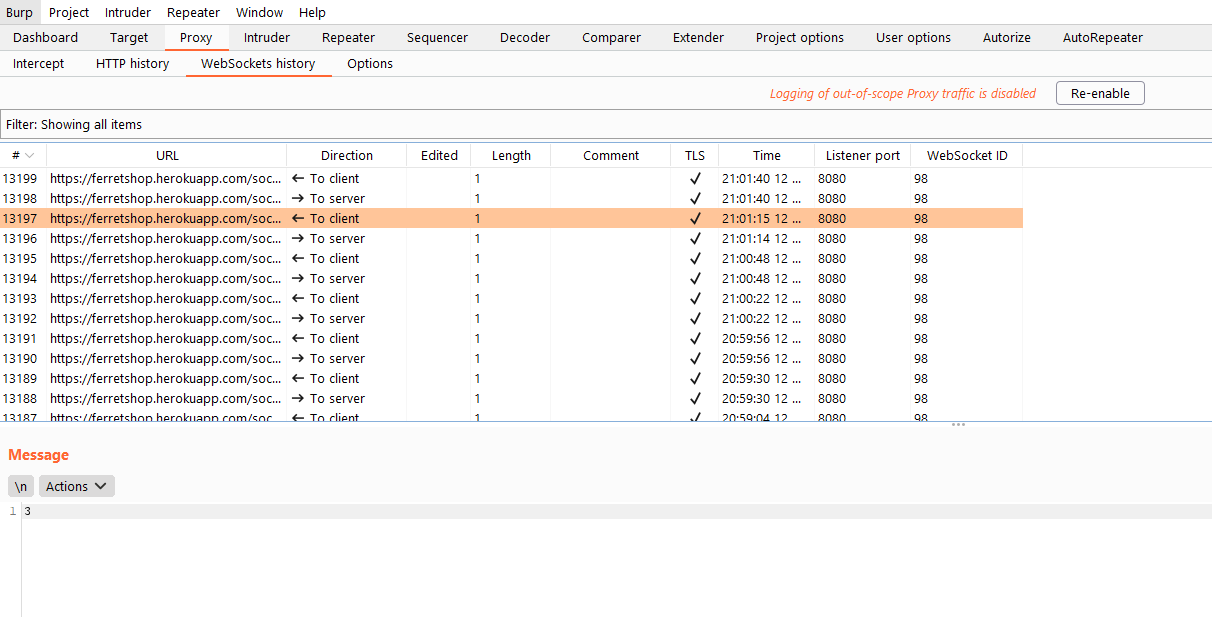
Filter
If we click the filter bar at the top of the screen, we can some very useful filters.
- Clicking the filter bar will open it for us
- In websockets, we can send messages to the server and it can respond but the server can also send messages to us and we can respond. To filter those messages we can hide outgoing or incoming messages
- If we want to search for specific terms, that also possible. We can do this in negative search as well, which would mean that we would exclude requests with the search term in it.
- We can also annote or comment certain requests by right clicking them in the site map, repeater or proxy history and then we can filter on those requests.
- We can have multiple proxy listeners which listen for incoming traffic on different ports. We can also filter per port. More on this later on in the proxy options.
Proxy options
Introduction
It may not seem like it but burp suite proxy options can have several useful things in store for us. It took me quite a while to figure this out but burp suite has has even more features then it may seem at first.
Proxy listeners
Several useful options exist in this section of the proxy options. We will be going through all of them.
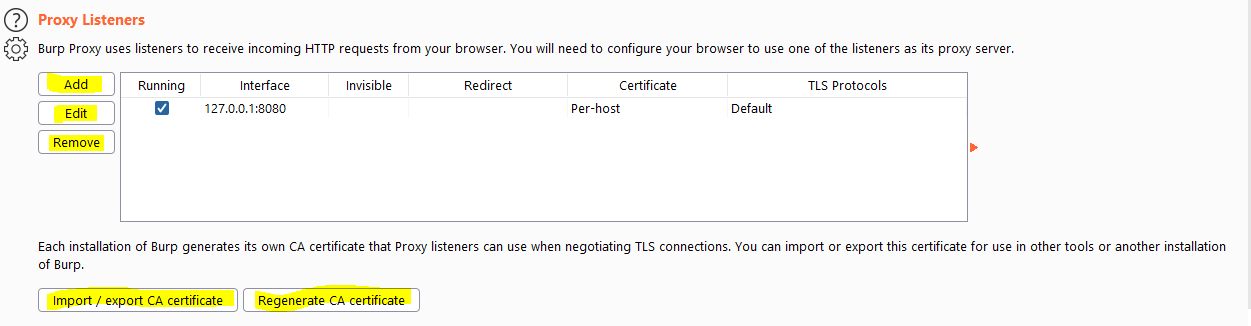
Adding proxy listeners
We can add another proxy listener. This is just another proxy that we can send traffic throught and we can add one on another port or another ip adress. This can be very interesting in the following situations.
- If you want to test a mobile application and a web application at the same time you might want to have them enter at a different port
- If you are testing multiple physical IoT devices, it might be useful to add another proxy listener to give all devices a seperate listener.
- We might want to have burp suite listen on different ip adresses in network situations
- ...
Editing/removing proxy listeners
If we made a mistake, we can edit or remove an existing proxy listener.
Import/Export CA certificate/Regenate CA certificate
We might need the CA certificate to add to windows so we can decrypt the HTTPS traffic coming from our browser. We might also need this certificate if we want to test mobile applications that communicate over HTTPS. This certificate can be exported here and imported into our testing client. We can also regenerate the certificate here should we need to.
Response modifications

I usually unhide hidden form fields, that's just a simple client side protection and usually hidden fields will contain valuable information.
I will also prominitly highlights them, doing this makes it so that any hidden form field will have a large red border around it, making it more easily visible.
I will also enable disabled form fields for the same reason as that i unhide hidden form fields.
I will also remove any field lenght limits, this might trigger some API errors if i send more characters than the API allows but sometimes developers don't even implement API checks and will only use front-end validation.
For the same reasons, I remove any javascript form validation. It's all just client side.
The other options i don't enable as they are there to protect against things like XSS and we can't just disable these fields on our victims browser.
Match and replace
See the match and replace document.